I have been away from the blog for a while but I have a good excuse. I have been spending all hours possible this month getting ready for the London Toy Soldier show this weekend.
In past shows, we have been selling toy soldiers or getting rid of old stuff but this show is the first one of a new approach. I no longer have soldiers to sell so my stand is full of terrain. It takes alot of time to fill 12 feet of space with scratch built 1/30th scale terrain pieces. I just about got finished today and here are photos of the results:
 |
| most of it grouped together |
I have all sorts there from WW2 ruins and sentry boxes to Roman watch towers and marching fort walls.
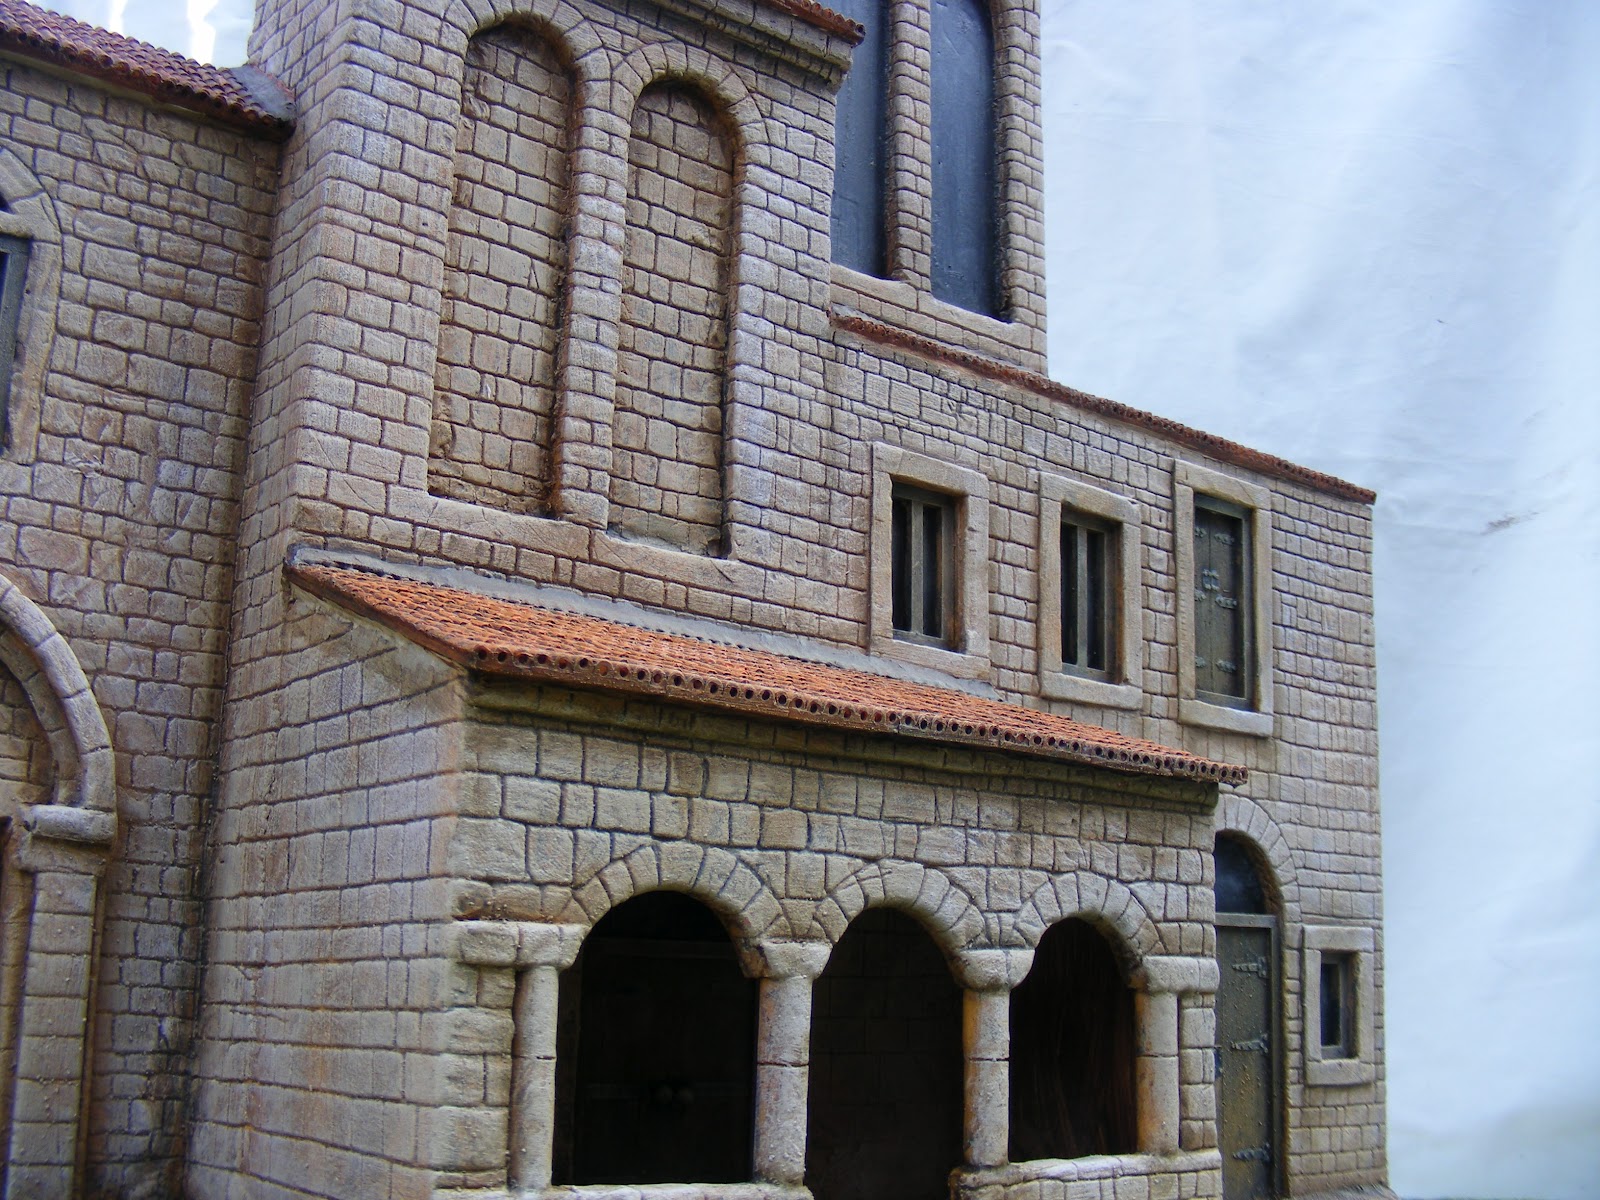
I wanted to do something set in Southern Europe as there are a few ranges around now that can use that sort of terrain. This is designed as a shelf display with it being only 6" deep. I used a photograph of a real building for inspiration with the front arches particularly catching my eye. The stone work is carved Daz Pronto air dried clay and the pan tiles are resin sheets that I have had made for me. I was going to use some other tiles but when I came to it I hadn't got enough.
This was inspired by a planned larger diorama for a customer that involves a sentry box. I really liked the idea and thought it would make an excellent stand alone piece. The arm works and most of it is made from balsa wood except the arm which is stronger pine dowelling. I really enjoyed painting the stripes.
This model was inspired by a discussion I had with a potential customer who wanted a Roman watch tower. I thought it would make a good piece to add to any Roman display so I thought I would give it a go.I made a frame of foam board but the rest is balsa wood including the individual tiles on the roof.
I always enjoy making these sort of buildings. They are perfect for the Wild West but will also fit in American Civil War layouts- a small town street scene. I haven't put any signage on to limit where they can be used. They are shelf displays with no detail on the back and only being about 6 inches deep. The windows are from my own resin collection and everything else is balsa.
While I was thinking what to do I suddenly got an urge to do part of Fort Tichonderoga. This is the main gate. There should be a garrison building behind the wall but I haven't added it to keep things reasonably simple. It seems the fort had a foundation of stone with the plan to build it all in stone eventually but the upper parts of the walls never got replaced from the original log construction. This is a surprisingly long piece- over 18" long so should make an impressive display with some John Jenkins French Indian War figures.
That is it for now with the photos. There is more that will be around on the day and there will be a model of Trostle farm, its barn and waggon shed as it was during the Battle of Gettysburg. This is for a customer and I have promised not to show him photos until he sees the real thing so I don't want to risk him seeing them here. There will be an article in the Toy Soldier Collector magazine later this year all about it but I will do a separate post just about that next week, after the show.
All these items are for sale at the show. If you have seen anything here that you want but can't make London then email me and if I still have it after the weekend we can sort out a sale then. If you are coming to the show then come over and have a look- they always look better in the flesh. I have things for sale to suit all pockets!