Thursday 22 December 2011

Sudan Village pt1


just painting this one
The Sudan village project has moved on over the last few weeks. I have been working on eleven buildings that come from kits or are already made. Four of the buildings are finished resin, 3 flat packed resin kits and 4 laser cut models.
laser cut gateway

laser cut house
 
laser cut big house

laser cut big house 2

resin flat pack with additions

flat pack again at an earlier stage

flat pack 3 just stuck together
I will also be making a number of scratch built houses so I need to blend all these model styles into a common theme. I am therefore plastering all the kits as well as adding extra details. Hopefully, that will make them all fit together nicely. Here are a couple of stages shown on the gatehouse-
plastered and base coat of yellow ochre

finished

The other buildings have been added to where necessary and now all eleven are well advanced- here are some photos. I must admit, I thought I had taken more.

plastered, base coated and washed laser cut house

plastered, base coated and washed resin flat packed house

It won't be long before these first 11 are done so I can then start on the scratch built pieces including a mosque.
I am pleased with how the different styles are blending together so the finished town will look good.


Mountain base project pt2

I have been hard at work on the mountain hide away this week so again, here is a last update before the end of the year.
I now have built the whole layout and textured most of it so you can really see what the finished base will look like.

The first time I have cut a base board into this sort of shape!

The cable car in position. when finished it will hang from a cable


The whole thing is 4ft x 4ft so you can guess how much foam board I have used- sheets and sheets of it!
At this stage I now sorted out the laser cut windows for the villains liar. It needed large imposing but perfect windows- ideal for laser cutting.
The windows have to go around the lair as you can see above- about 90cm of window altogether at about 5cm high. The plan was to sandwich a sheet of clear plasticard in between two window frames. The frames arrived this week so was able to fix them in place, keeping my fingers crossed that I had the right measurements. All was well.


I had another set of frames for the room in the bottom right- alot smaller but still best made by a laser cutter.
these windows are 3cm high
The rest of the week was taken up finishing off detail-
rock face and supporting pillars added and a shaped roof

more roof shape detail

mdf roof added. I have to sort out the finish on this

another roof shot

windows and roof.
The first job I have when I start again is the railings. If you look at the original sketch you can see there is alot of railings-
There must be 10 feet of railings
I thought it would be a good idea to design a more interesting railing rather than just a normal metal one so I got in touch with the laser cutter with a few ideas and I got this back-
A great idea especially if I can make it look like concrete. I got the pieces at the same time as I got the windows-

hundreds of pieces!
I think it will keep me busy for a while. It should be worth it though.
That is it for this year on this mountain project. I need to add details inside the villains lair (a bit of interior decorating!), work out how to get the cable car to hang on a wire convincingly and then paint it all and turn it into a snowy scene.


Normandy Village pt3

I thought I would do one last post on this Normandy village before the end of the year. I haven't got quite as far as I had hoped this week as when I came to get some paving stone embossed plasticard I found I hadn't got any!
There was still lots to do. I have been able to finish off the plastering and texturing and add the shutters to some of the windows. I have used two types- one wooden planks that I have had cast in metal and then some louvred shutters that I had made in resin. I used the two types for variety as that will add impact when it comes to painting.
The resin shutters get lost on the above photo as they aer white but the metal ones show up very well.
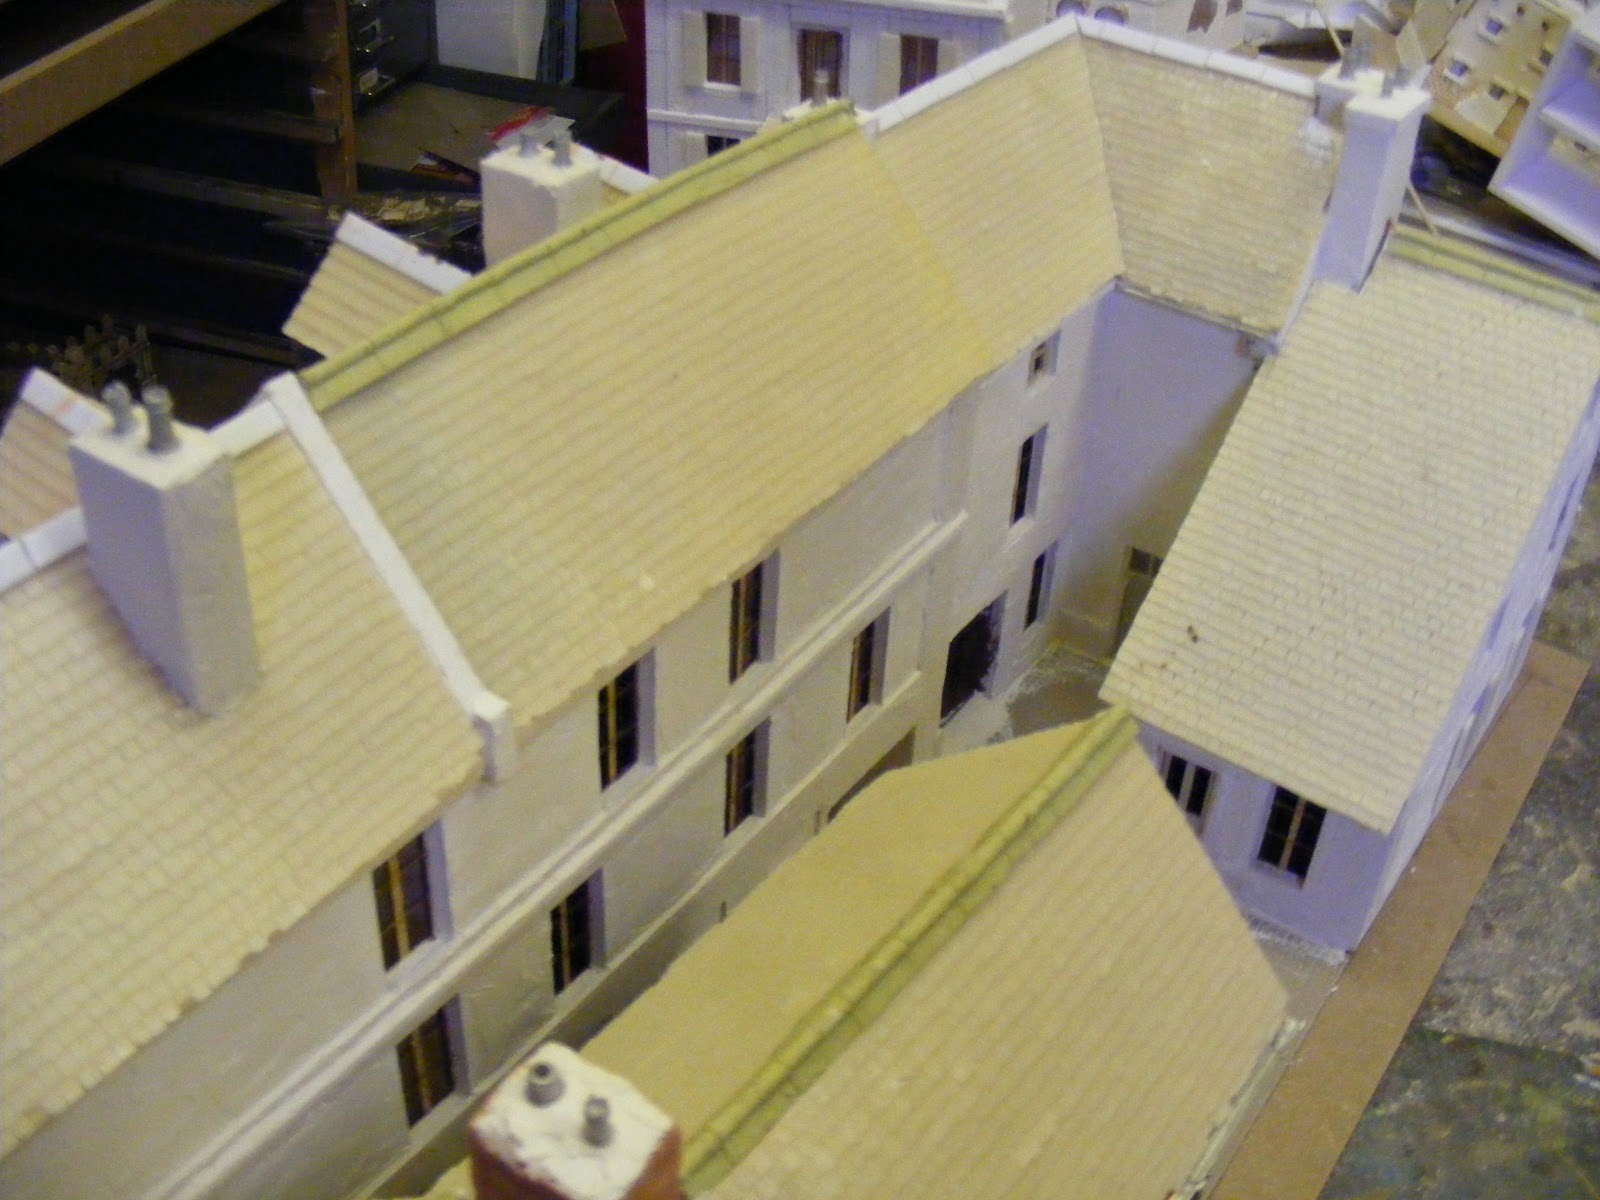
You can see from the photo that I have also added roofs and guttering. The roofs are my own sheets of resin tiles that I have cast. This saves me many hours as I used to stick individual tiles down. The guttering is metal and I get that cast locally. I find it very fiddly to do but the effect is well worth it.


The roofs all come off although only the backs so I could get the best look from the front. When the roof is loose it is almost impossible to get rid of gaps and gaps ruin the effect.
I have played with some of the ridge tiles. I have used them to hook the loose piece of roof to the attached piece. Some of them are just plain strips but others I added a strip of plastic rod and then covered it in miliput to end up with a decorative ridge tile.
The above photo shows how the roofs add to the covered and hidden feel of the court yard and the whole thing feels as if it is really coming together.
I realised I had forgotten the chimney so added one here.

I now glued half of the buildings to the base just leaving the stone one off so I could easily paint the back of all the buildings. I also added some random stone plasticard to the court yard just to make it different from the pavement. I was then able to start painting. I could only do the rear as the pavement was still missing. I have used the usual pallet- yellow ochre base, washed in raw umber and then dry brushed with lighter and lighter tomes of cream. I haven't got all that way yet so can only show you a couple of the stages.
base coat added- not a great look

washed brown
The final job I did this week was paint the roof a base coat of dark grey. I then need to wash it brown and then dry brush up a few shades of grey- but that is for the new year.
grey roof and now with pavement added.

That is it for now. I have realised that I haven't taken any photos of the single house. I have started painting it as well as completing the roof so it has moved on nicely but photos will have to wait until next time.
The next post will be of them finished I hope!

Wednesday 7 December 2011

Normandy Village pt2

I have also been working on the Normandy village. It seems I have spent along time on the project this week but not made alot of obvious progress. The last post showed the start of the 'island' of buildings but I have also been working on a single, grander building based on this photo-
You may recognise it as the 54mm building I did a while ago. The customer was so impressed he wanted the whole thing so this time I am doing it front and back along with some outhouses. I suppose this has taken up alot of the time this week as adding the trim you can see on the front of the building takes time. I got the various patterns of the brick work by cutting up brick embossed plasticard. The tiles were made by scoring plain plasticard into small squares ready to be painted to look like individual tiles. I have now got this building up to the same point as the other houses
a close up showing the brick details

the outhouses and the house has a much plainer rear.
The 'island' of houses have become more substantial with internal walls and floors added (the windows are open so I think it looks odd to be able to see straigth through a house so the internal walls stop this happening- I haven't laid the walls out to creat rooms, just to cut out views from one side of the house to the other).
I have also carved the stone on one of the corner buildings as well as adding card to the others to add detail and interest. I have tried to vary the patterns on each model. I can also vary the rest of the plastering of the walls as well as the colours so each one will be unique.
All this preparation work is necessary but is one of the most frustarting stages because very little seems to happen but if you don't take your time here the finished building won't look as good.
The final bit of detail I added was the corner shop frontage. I just built it up with balsa wood and plasticard. I may add more later- I will see how I feel.
the carved stone ready for painting
the whole thing- not alot of difference from last time!

a better look at the addition of card to creat interest

the rear showing the stone work and the card detail

the corner shop front detail

the card details and shop start to lift this row

details of the card work and I have started plastering
The next stage is to finish the plastering on all the buildings and then start painting. I can't fix them to the base until they are painted as I won't be able to do a good job on the rear of the houses once they are down on the base because they are so tightly packed together. I can also be working on the roofs.

The next post should look far more impressive (I hope anyway!)