This diorama has been done for a couple of weeks but only now can I find the time to post it.
The whole thing is 2 feet by 2 feet in size but split into 4 1 foot square pieces so it can be displayed in various ways depending on the space available.My customer had given me a detailed layout so all I had to do was interpret his wishes.
One of the most important parts of the diorama is the cobble stoned road where most of the figures and vehicles will be displayed. I have found a good supplier of these sort of things- Miniart (http://miniart-models.com/) do a cobblestone set in plastic. It is good value and the detail is spot on.
I gave up making trees ages ago and so buy them from JG miniatures in Sheffield. This diorama has two of his birch trees and two tree line sections. They are great and fit in with my colours and style.
There is quite a bit of fencing on this layout so we decided to go for barbed wire fencing to keep it interesting. This was the first time I had done this wire fencing in this scale and will definitely use it again. I use textured steel wire. It is very shiny so I leave it in vinegar for a week and when it comes out it is beautifully weathered.
We also needed a road side shrine. I found a pretty little statue that I painted grey and built a small structure around it. I placed it just off the road in amongst the trees so should add a bit of interest.
The rest of it was built up using flock and scatter mainly from Woodland Scenics along with some water mix for the ditches either side of the road. That is about it.
The photos have 2 First Legion German infantry in them just to show scale and terrain always looks better with figures on it. Please ignore the fact they are from their Stalingrad range!
Just to finish off here are a load more photos of the diorama:
Showing posts with label diorama's-WW2. Show all posts
Thursday, 29 March 2012
Wednesday, 30 November 2011
54mm Snow scene for Figarti part 2
It is finished. I was able to add the snow to the boards on Monday and then patch it up and add a bit more on Tuesday which leaves the rest of the week to dry off.
I use alot of watered down PVA glue so it does need a good 48 hours to dry.
I photographed the boards outside and there wasn't enough room to place both boards together so I had to photograph them separately. The final shots from the show will have them together full of Figarti figures.
Here are the final results:
I use alot of watered down PVA glue so it does need a good 48 hours to dry.
I photographed the boards outside and there wasn't enough room to place both boards together so I had to photograph them separately. The final shots from the show will have them together full of Figarti figures.
Here are the final results:
Saturday, 26 November 2011
54mm snow scene for Figarti
The London Toy Soldier show is fast approaching and the 54mm snow scene is taking shape about as quickly as I had expected.
The display is a 4ft x 2ft diorama for Clive at grey Goose who is the European distributor for Figarti. The layout is designed to display their new winter vehicles- Tiger tanks and artillery and limber I think- Clive has the details I am sure.
If you read my November plans post then you will have seen the plan but just as a reminder here it is again-
I think the idea is to have the limbered artillery along the road and the tanks in the fields behind. The whole scene is to be snowy and wintry. I want to make the fields covered with fresh untouched snow except for the tracks of the tanks whereas the road will be churned up full of ice, snow and mud.
I began a couple of weeks ago with the base boards, cutting the ditch out of the polystyrene and adding a couple of small bumps in the fields that will look something like soft dunes when finished.
You can see from the plan that there is a ruined wooden house in the bottom right corner. I wanted it to have a stone chimney that stood up while all around was destruction so I started making that with a frame of foam board covered in Das Pronto clay and then carved to look like stone.
As soon as that was done I stuck it to the board for no better reason than I wanted to see it in place. I then added logs that I had roughly squared up. I ended up being a bit short of space so had to use the chimney as a house corner as you can see in the photo.Over the next couple of days I added the texture to the road by coating it with grout mixed with some builders caulk (I buy it is tubes from B and Q and I use it for all sorts of things- a very useful general purpose bit of kit). I then ran a plastic wheel along the road which left lots of tracks in it- a good base for a snowy, muddy road.
The rest of the board was covered in grout and the ditch had lots of rubbish thrown in it to give it texture. Once it was dry I could start painting and adding the wood work for the fences and bridges
Although I was going to cover the whole thing in snow I still set about painting and finishing it as if I was going to leave it without snow. The only extra things I do is to highlight with a white dry brush over everything to help give the feeling of cold and frost as well as in places over exaggerate the texture so I can have stuff coming up through the snow. This sort of thing really works with the snow effect.
The paint job was just basic browns, washes and high lights. Once all that was dry I added the vegetation, again planning for it to show through the snow so using long grass and highly textured ground work.
The final effect, all ready for the snow storm has turned out OK-
You can see that I have added lots of wood in the ruined house as well as finishing off the fences. The vegetation is concentrated in front of the road and around the fencing with nothing on the roads, as they will all be mud, and the fields behind the roads as they want to be beautiful untouched snowy fields so having grass underneath would be a waste of flock.
You may also notice the heavy white dry brush on the fencing and roads. This doesn't look quite right in these photos but once the snow is on then it will just help the whole wintry effect.
There is just one week to go so the snow will go on on Monday and Tuesday leaving the rest of the week for it to dry. It needs that length of time because I really soak it with PVA glue to make sure it stays and I also mix some of the snow powder with PVA to make a thick white paste to put onto flat surfaces and I can make it droop over the side. I really like the effect it gives.
I am going to try a new product to me and that is the Deluxe shoveled snow that they say you can pile up and squash detail into it and it the detail stays (such as tank tracks) and I hope to be able to pile it up like cleared snow. We will see how it goes. Also, there is a shell hole in the road and I want to try to put a watery puddle in it with smashed ice around it. It should look good if it comes off.....
Anyway, that is it for this one. I will post more photos of the finished job and then photos of it on display at the show.
Talking about the show, if you are in London on the 3rd December then come along. It is a good day out if you are into your model soldiers. Details can be found here:
www.thetoysoldiershow.com
I am sure I met a lardie last December (it was you wasn't it Thomas?)
The display is a 4ft x 2ft diorama for Clive at grey Goose who is the European distributor for Figarti. The layout is designed to display their new winter vehicles- Tiger tanks and artillery and limber I think- Clive has the details I am sure.
If you read my November plans post then you will have seen the plan but just as a reminder here it is again-
I think the idea is to have the limbered artillery along the road and the tanks in the fields behind. The whole scene is to be snowy and wintry. I want to make the fields covered with fresh untouched snow except for the tracks of the tanks whereas the road will be churned up full of ice, snow and mud.
I began a couple of weeks ago with the base boards, cutting the ditch out of the polystyrene and adding a couple of small bumps in the fields that will look something like soft dunes when finished.
You can see from the plan that there is a ruined wooden house in the bottom right corner. I wanted it to have a stone chimney that stood up while all around was destruction so I started making that with a frame of foam board covered in Das Pronto clay and then carved to look like stone.
As soon as that was done I stuck it to the board for no better reason than I wanted to see it in place. I then added logs that I had roughly squared up. I ended up being a bit short of space so had to use the chimney as a house corner as you can see in the photo.Over the next couple of days I added the texture to the road by coating it with grout mixed with some builders caulk (I buy it is tubes from B and Q and I use it for all sorts of things- a very useful general purpose bit of kit). I then ran a plastic wheel along the road which left lots of tracks in it- a good base for a snowy, muddy road.
The rest of the board was covered in grout and the ditch had lots of rubbish thrown in it to give it texture. Once it was dry I could start painting and adding the wood work for the fences and bridges
| basic undercoat of grey for stone and yellow ochre for wood |
| texture added to ground work and the start of the fences. |
The paint job was just basic browns, washes and high lights. Once all that was dry I added the vegetation, again planning for it to show through the snow so using long grass and highly textured ground work.
The final effect, all ready for the snow storm has turned out OK-
You can see that I have added lots of wood in the ruined house as well as finishing off the fences. The vegetation is concentrated in front of the road and around the fencing with nothing on the roads, as they will all be mud, and the fields behind the roads as they want to be beautiful untouched snowy fields so having grass underneath would be a waste of flock.
You may also notice the heavy white dry brush on the fencing and roads. This doesn't look quite right in these photos but once the snow is on then it will just help the whole wintry effect.
There is just one week to go so the snow will go on on Monday and Tuesday leaving the rest of the week for it to dry. It needs that length of time because I really soak it with PVA glue to make sure it stays and I also mix some of the snow powder with PVA to make a thick white paste to put onto flat surfaces and I can make it droop over the side. I really like the effect it gives.
I am going to try a new product to me and that is the Deluxe shoveled snow that they say you can pile up and squash detail into it and it the detail stays (such as tank tracks) and I hope to be able to pile it up like cleared snow. We will see how it goes. Also, there is a shell hole in the road and I want to try to put a watery puddle in it with smashed ice around it. It should look good if it comes off.....
Anyway, that is it for this one. I will post more photos of the finished job and then photos of it on display at the show.
Talking about the show, if you are in London on the 3rd December then come along. It is a good day out if you are into your model soldiers. Details can be found here:
www.thetoysoldiershow.com
I am sure I met a lardie last December (it was you wasn't it Thomas?)
Tuesday, 20 September 2011
54mm diorama- France,WW2
I was approached to produce a 54mm diorama that would be able to display a large number of vehicles and figures on a number of different levels. If the diorama was on just one level then the displayed hardware could get confused and the overall effect lost.
After quite a bit of going backwards and forwards with ideas we came up with the following plan- a road running alongside a canal. The canal also has a small dirt track at 'water level' running under a bridge. The diorama was to be backed by a number of house fronts that could have figures placed in the windows. The final level was achieved by adding a small jetty to the canal. It meant we ended up with 5 different levels for figures to be displayed on.
The above picture shows the diorama at a very early stage. The unique thing of this picture is the drawing I have added to the layout at this early stage. I tend to plan and design as I go so to look that far ahead in a project for me is unusual! It does give you a very good idea of how the finished layout will look and what is trying to be achieved.
The diorama ended up being about 3feet x 3feet and to give it strength and to have good clean edges I had a wooden carcass made (as I do with nearly all terrain boards and dioramas) and filled it with polystyrene. That gave me the basic shape and I then knew I could happily add the detail to it or easily cut into it for the stairways and trenches.
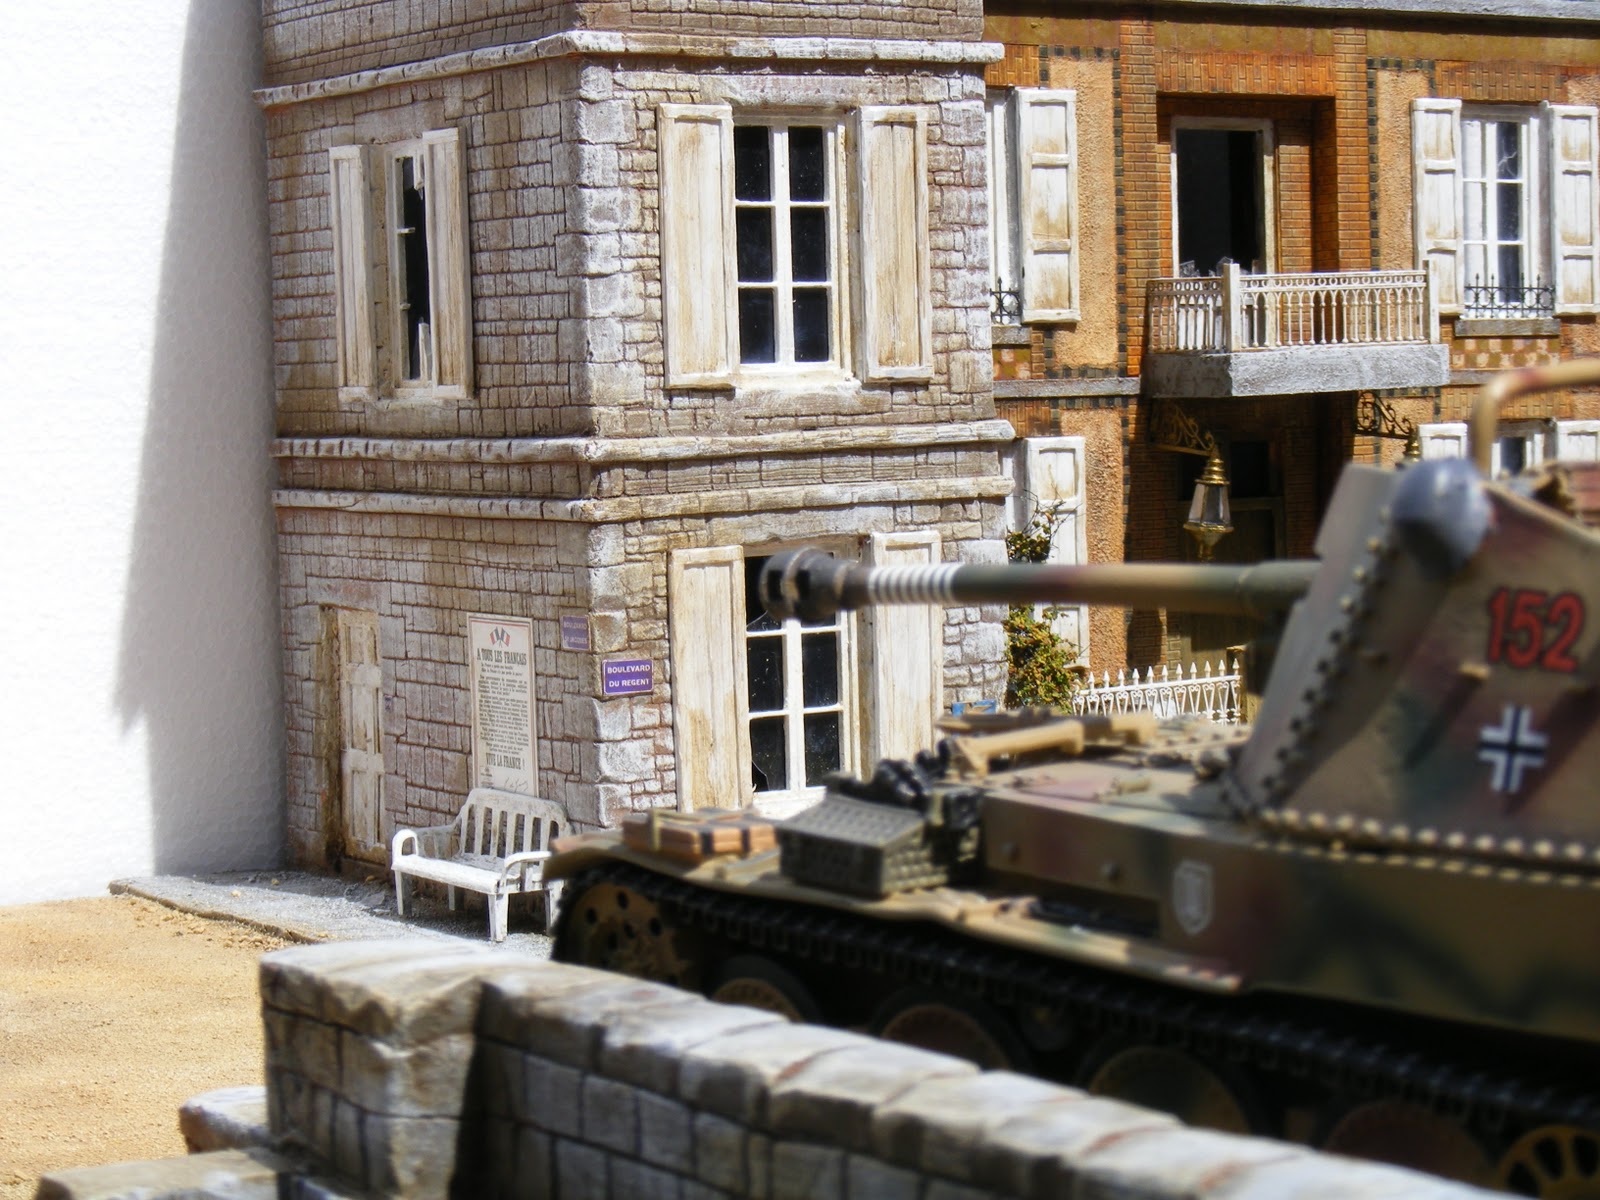
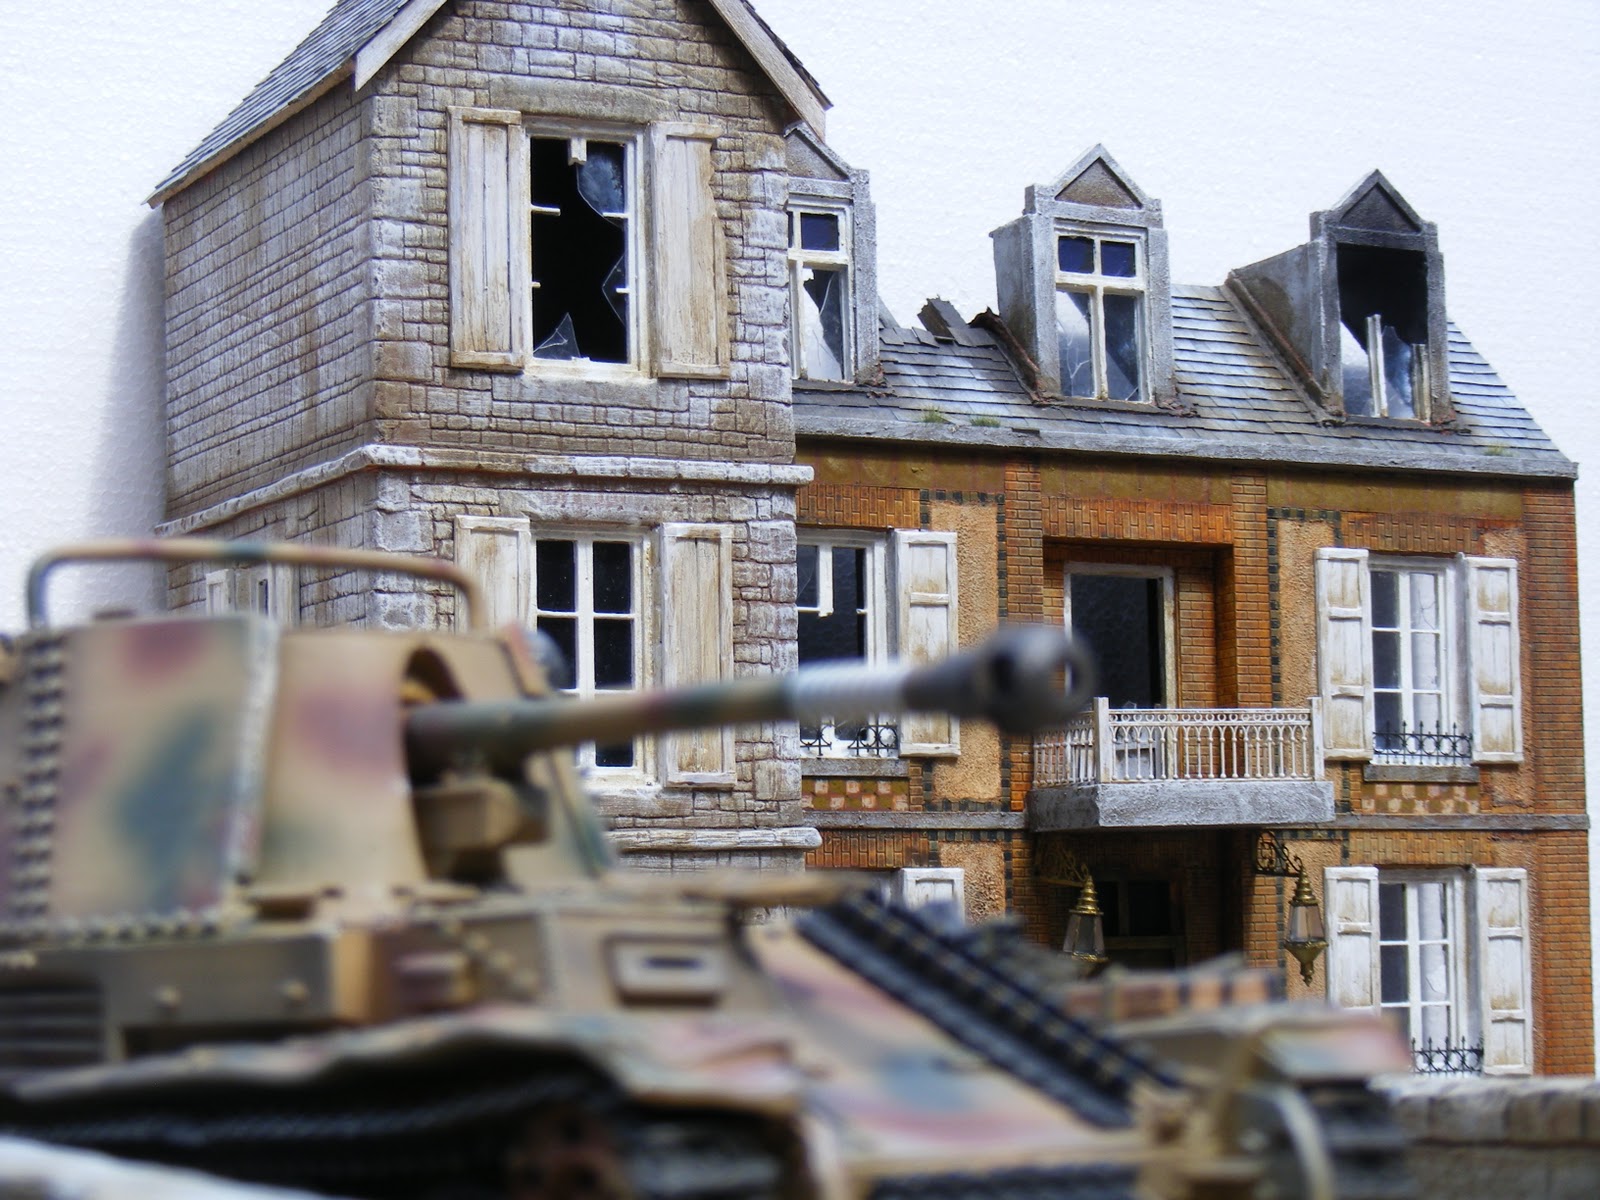
The buildings fronts were inspired by real Normandy buildings- the building on the left is based on Cafe Gondaree that you can find next to Pegasus bridge
I had the original window design laser cut and they came out beautifully- the detail is very delicate and the whole thing is perfectly square. The door comes from my stock of resin pieces and the wall finish is a mix of platicard strips and grout.
The next two buildings come from photos I took when I was in Normandy last summer. I can't remember where I was but this is the photo I took of this wonderfully atmospheric French house. I just had to make it.
The model again is made using windows I had laser cut but this time in a different design. I used brick embossed plasticard to recreate the brick and tile patterns. It doesn't look much now but you need faith that it works out in the end.
The building to the left of this house, that you can see is red, was based on a few I saw on my Normandy trip and was also influenced by the amount of space I had left. I decided on a stone building to contrast with the other two. It is red in the picture because I have covered it in Daz Pronto- the air dried clay. I then carve out the stone pattern in it. I find it works really well as long as you don't run out of patience!
Once I had the basics done, it was just a case of adding more details and painting it. During this stage I pretty much stuck to the original plan although I had planned on adding a trench to the left of the bridge but when I cam to it it didn't work out. There needed to be some sort of wall there to stop people falling over the edge so I extended the wall from the bridge and added sandbags to that to give it the fortified look.
Unfortunately, I don't have any photos from this stage to when I finished so I can't really explain what I did to get to the finished piece. It is a sure sign that I got carried away in the creative process and forgot about taking photos.
All there is now is a series of photos of the finished project:
That is it for this project. I was very pleased with how it turned out. I have been asked to make the larger house in 1/56th scale so I am looking forward to that next. Details to follow of course.
After quite a bit of going backwards and forwards with ideas we came up with the following plan- a road running alongside a canal. The canal also has a small dirt track at 'water level' running under a bridge. The diorama was to be backed by a number of house fronts that could have figures placed in the windows. The final level was achieved by adding a small jetty to the canal. It meant we ended up with 5 different levels for figures to be displayed on.
| early stages where you can see the levels involved. |
The diorama ended up being about 3feet x 3feet and to give it strength and to have good clean edges I had a wooden carcass made (as I do with nearly all terrain boards and dioramas) and filled it with polystyrene. That gave me the basic shape and I then knew I could happily add the detail to it or easily cut into it for the stairways and trenches.
The buildings fronts were inspired by real Normandy buildings- the building on the left is based on Cafe Gondaree that you can find next to Pegasus bridge
I had the original window design laser cut and they came out beautifully- the detail is very delicate and the whole thing is perfectly square. The door comes from my stock of resin pieces and the wall finish is a mix of platicard strips and grout.
The next two buildings come from photos I took when I was in Normandy last summer. I can't remember where I was but this is the photo I took of this wonderfully atmospheric French house. I just had to make it.
![]() |
| the real house |
| early days with the model |
The building to the left of this house, that you can see is red, was based on a few I saw on my Normandy trip and was also influenced by the amount of space I had left. I decided on a stone building to contrast with the other two. It is red in the picture because I have covered it in Daz Pronto- the air dried clay. I then carve out the stone pattern in it. I find it works really well as long as you don't run out of patience!
Once I had the basics done, it was just a case of adding more details and painting it. During this stage I pretty much stuck to the original plan although I had planned on adding a trench to the left of the bridge but when I cam to it it didn't work out. There needed to be some sort of wall there to stop people falling over the edge so I extended the wall from the bridge and added sandbags to that to give it the fortified look.
Unfortunately, I don't have any photos from this stage to when I finished so I can't really explain what I did to get to the finished piece. It is a sure sign that I got carried away in the creative process and forgot about taking photos.
All there is now is a series of photos of the finished project:
| the whole thing |
| the stone house- made from carved Daz Pronto clay |
| the railings are raised 1/56th scale plastic railings |
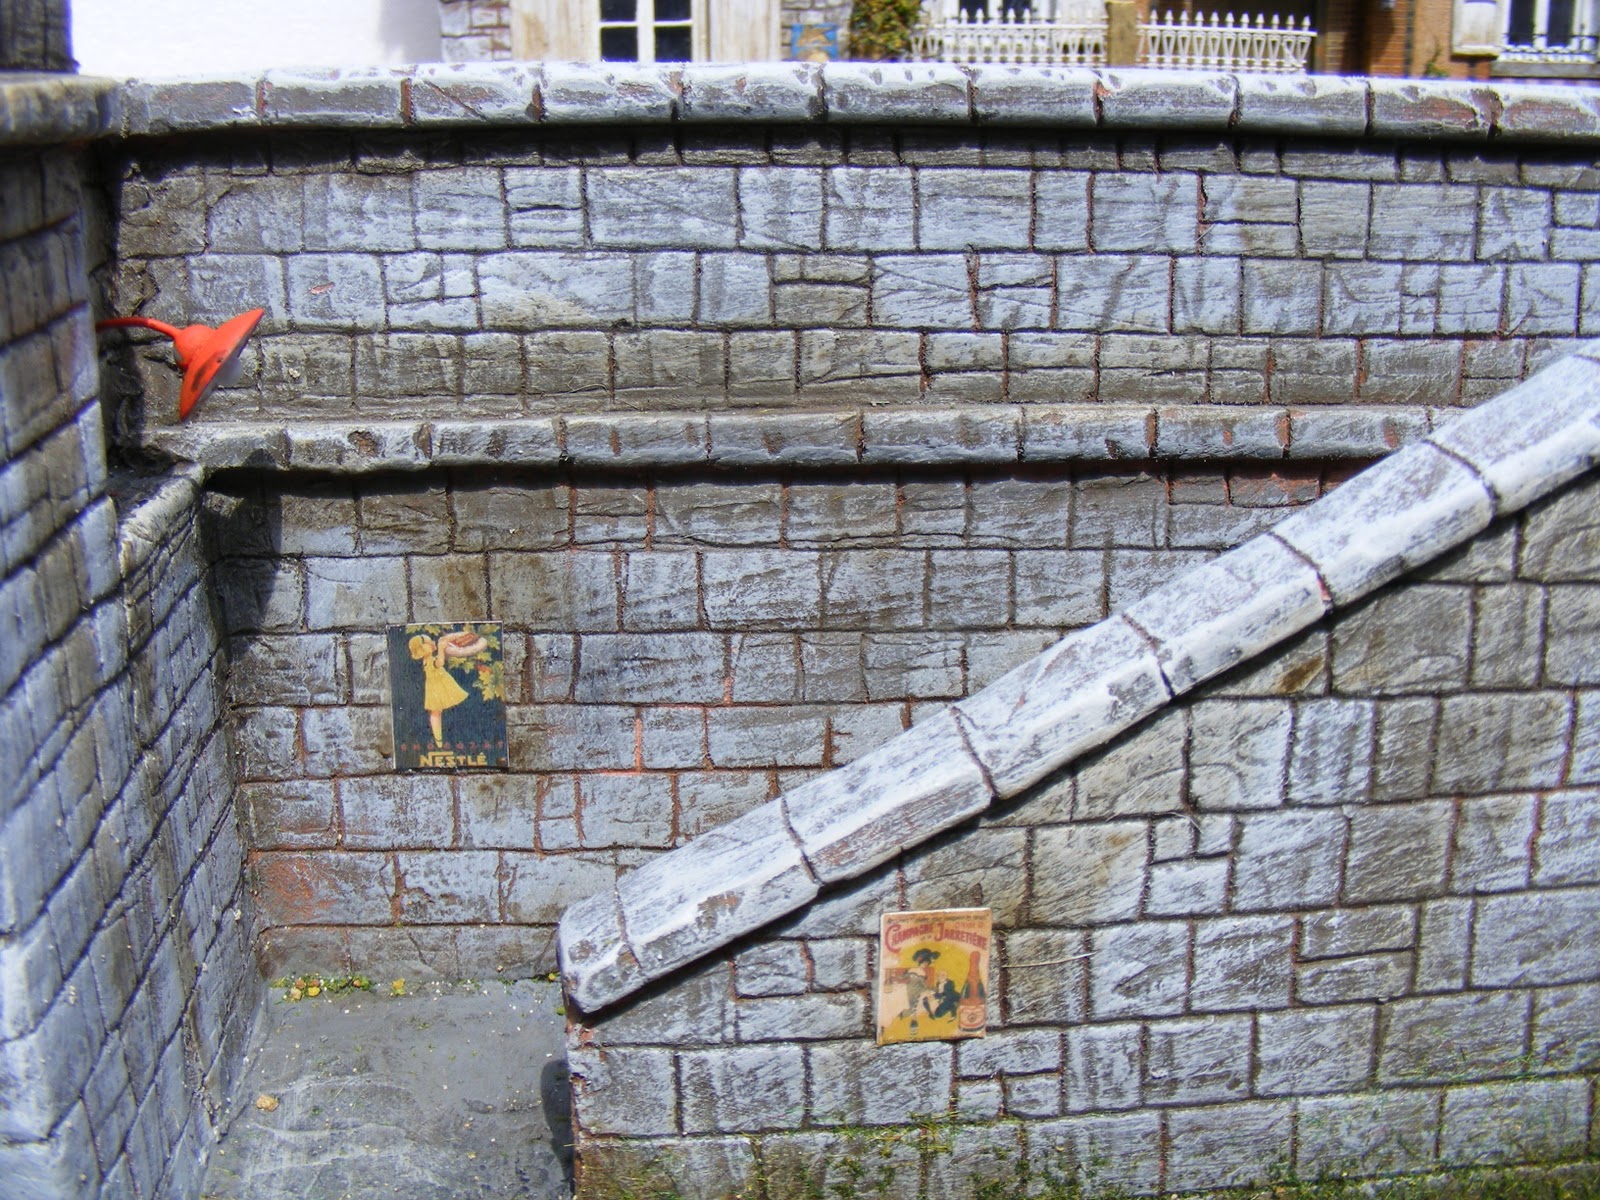
| stairs up from the canal- stone is, again, carved Daz Pronto |
| view from the canal |
| added broken glass to the windows adds to the look of battle damage |
| close up of the brick patterns on the front of the house |
| the sandbags on the retaining wall |
| a Wespe coming over the bridge |
| close up of the garden. I like the bullet holes in the window |
| posters downloaded from the web- they add colour and interest |
| I just like this shot! |
| more posters. The bench is from a plastic wild West Saloon set! |
|
| roof detail- damaged but neglected |
That is it for this project. I was very pleased with how it turned out. I have been asked to make the larger house in 1/56th scale so I am looking forward to that next. Details to follow of course.
Subscribe to:
Posts (Atom)